Seems like Fall is in the air as I’m finding myself seeking all kinds of excuses to stay home and bake.
Yesterday I stumbled upon this blog Almond Cornerand was absolutely thrilled by the recipes on there and fascinated by the photography. A Maltese saying goes L-ewwel Ma Tiekol L-Ghajn…and it is so true with anything. Loosely translated, it means that the eye is the first to eat…as now I’m completely hooked.
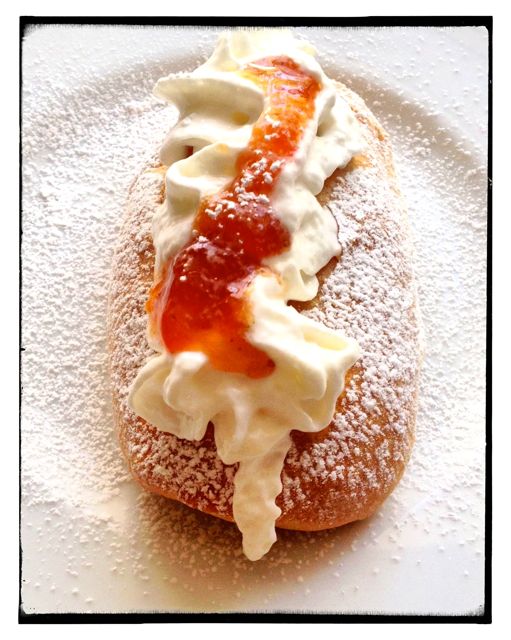
As soon as I saw these braided buns, I knew I had to make them. I felt slightly uneasy at first as I had to convert the weight to my lbs and ozs…I know, I’m still living in the middle ages. But besides that, I also halved the recipe and used my bread machine. I thought the recipe called for a bit too much yeast so I adjusted it to what I thought was a good amount. And even after all that, I was blown away by the result!
So here’s my adaptation for these delightful buns. As you can see from my photos, I attempted braiding them but after the second try, I aborted the mission and resorted to forming them my way as I was getting myself into a knot too.
Ingredients
1lb all purpose unbleached flour
1 oz sugar
1/2 tsp salt
10 oz milk
4 1/2 oz butter
3 tbs oil
1 egg
2 1/4 tsp yeast
Preheat oven at 375 degrees.
Warm the milk until it’s luke warm.
Put all the ingredients in your bread machine and set on the dough cycle.
When the cycle is done, take out the dough, cut into about sixteen equal portions and form into rolls or if you’re brave enough, into braids. You can find instructions on here
Brush each with a beaten egg and bake. After they’re done baking for about 15-18 mins, brush with some melted butter and put them back in the oven for a short while. (I skipped this step this time, but will definitely do it next time.) These are best eaten on the first day.
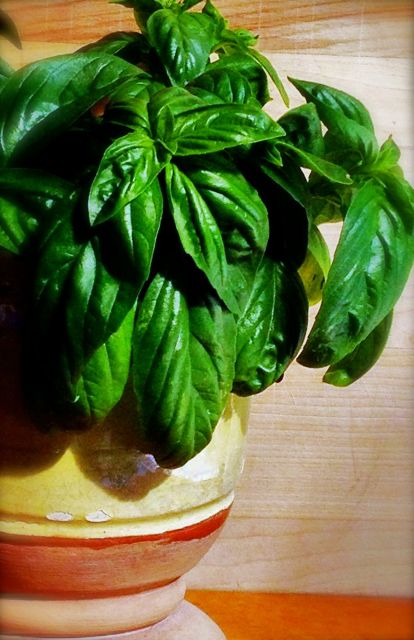
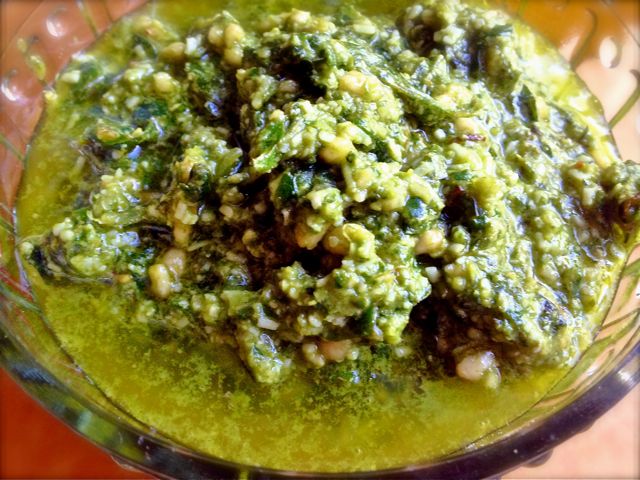
Pesto needs no introduction in any Mediterranean kitchen. It is definitely a staple in my pantry as it is so easy to whip up a quick meal when you in a hurry.
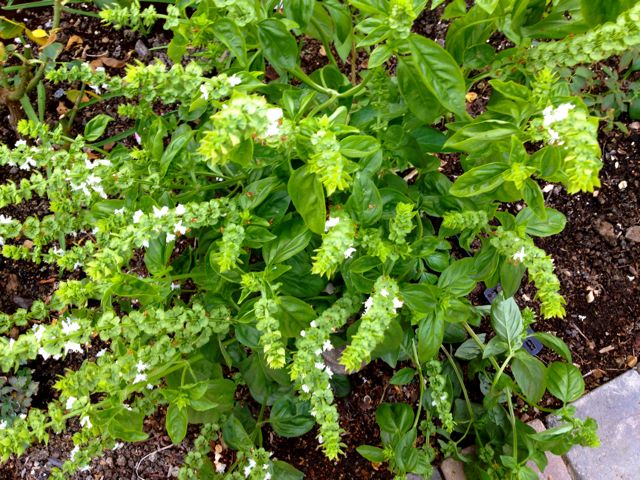
I usually grow basil in a pot just so I could place it in my bay window and have it be easy to access while cooking. I find that it would get root bound too fast this way and start turning yellow in a matter of weeks, so this year I decided to grow them in between my rose bushes and let them grow freely. And wow, did they like this so much more!!
There are many ways to make pesto…with cheese, without cheese, with pine nuts or walnuts, with basil or parsley…so use whatever you have and adjust or substitute to your taste.
Ingredients
2 cups fresh basil leaves packed
1/2 cup grated Pecorino Romano cheese
1/2 cup extra virgin olive oil
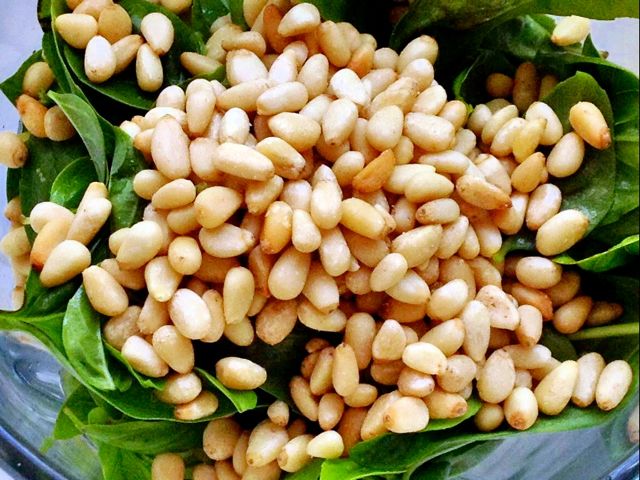
1/3 cup pine nuts
3 medium garlic cloves
salt and freshly ground pepper
Combine the basil and the pine nuts and pulse a few times in a food processor.
Add the garlic and cheese and pulse a few times more.
Pine Nuts
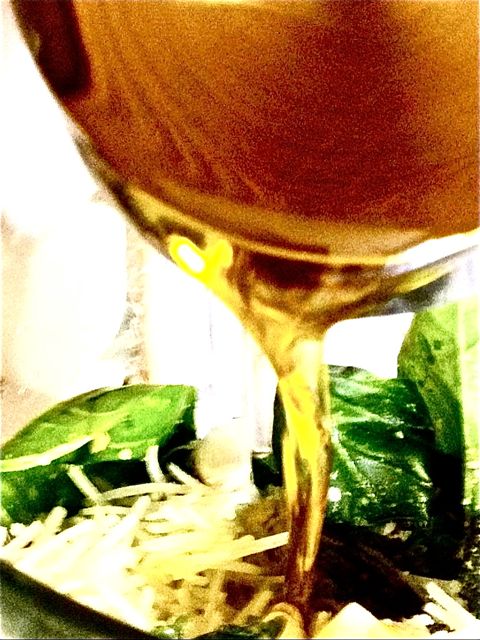
Slowly add the olive oil in constant stream while the processor is on. Stop and scrape down the sides of the food processor.
Extra Virgin Olive Oil
Add salt and pepper to taste.
Serve with pasta, baked potato or spread on your favourite sandwich.
This year I went a little bit crazy buying tomato plants. Over the past few years I’ve tried planting eggplants and I’ve tried zucchini and cucumbers…but always had a measly return for my efforts making me feel like a green failure. Tomatoes on the other hand, grow like a weed and produce exceptional fruit! So this year, I filled every bit of soil with Early Girl tomato plants and a couple of cherry tomato plants.
And now…a few months later, I have tomatoes coming out of my ears, and have been trying out numerous recipes to use them. So far I’ve canned whole tomatoes and tomato sauce. I’ve tried tomato jam with great results. And of course I’ve had hobz biz-zejt u t-tadam (bread with tomatoes and olive oil)…which is my ultimate favourite summer food!!
Then last week, my friend Terrie whom I have known since our school days, posted photos of her oven dried tomatoes and I could not stop drooling!! So here it is…all the way from Holland…Terrie’s Oven Dried Tomato recipe.
Like every maltese cook, Terrie’s recipe went something like this…
“Bit of this and a pinch of that”
You get the picture…so I’m going to try my best and give you the quantities, but please feel free to add or omit and adjust to your heart’s content.
Ingredients
3 lbs tomatoes cut in half and deseeded salt
1/4 -1/2 cup olive oil 2-3 cloves garlic 1 tbsp fresh basil 1 tsp mint 1 tsp fresh thyme 1 tsp oregano salt and pepper
enough oil to pack the tomatoes
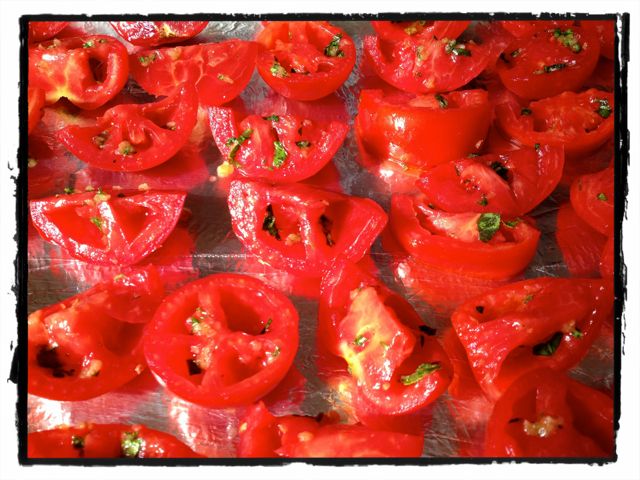
Freshly Cut Tomaoes
Cut the tomatoes in half and deseed. Sprinkle some salt on each half and place them face down on paper towels in a dish and leave them there for about half an hour to absorb some of the juices.
In the meantime, mince the garlic and place in a small bowl along with the rest of the chopped up herbs and salt and pepper.
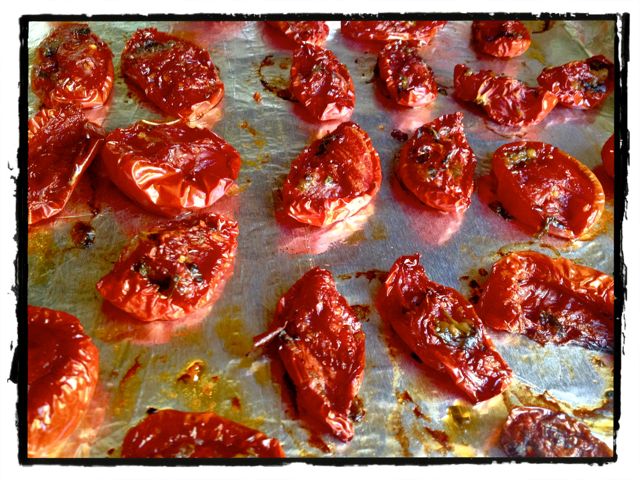
Quarter the tomatoes and brush them with oil mixture. Place in a prepared dish about half an inch apart. Sprinkle some salt and pepper. Bake in 250 degree oven for about 3-4 hours depending on your oven. Mine took longer so keep checking them until they’re done.
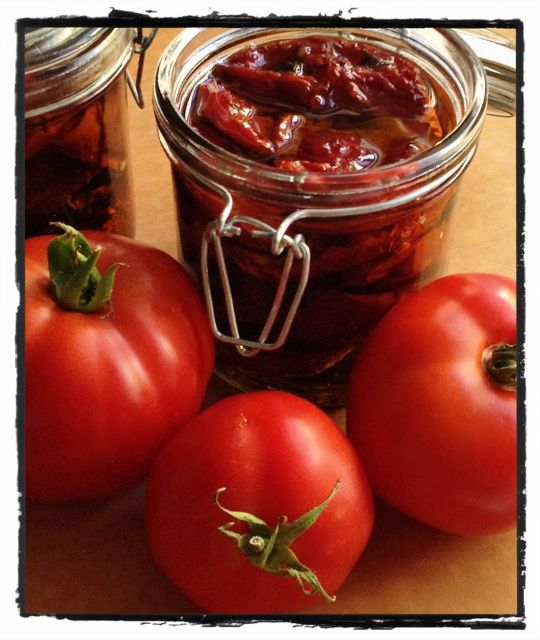
Oven Dried Tomatoes
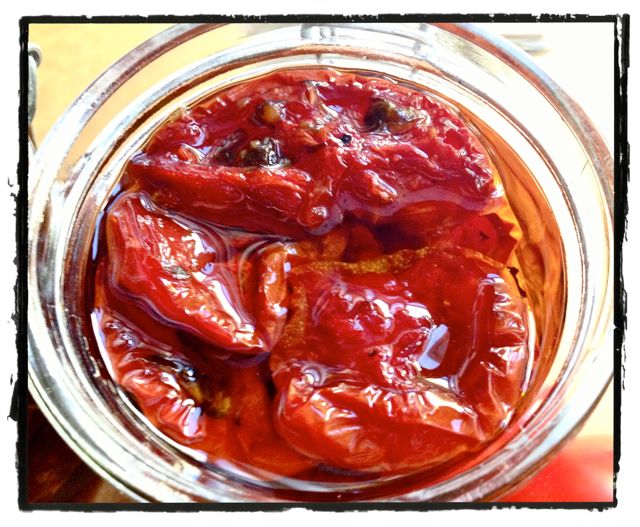
Let cool and place in sterilised jar. Pour enough olive oil to cover the tomatoes. Store in refrigerator.
Hello again! I hope you’re all having a lovely summer whatever you’re doing and wherever you are. I know Summer is all about salads and baking is probably the last thing on anybody’s mind in this heat, but I’m a baker at heart and nothing, not even the worst heatwave will deter me from my beloved oven.
So since my last post, I have been working hard on this recipe, trying to get it the way I remember it to be growing up. There are a few recipes online that looked promising but somehow neither of them seemed to be authentic to my memory…so after about a dozen try outs, and with the help of all my friends who have tried this and given me their honest opinions, I think I am ready to post it.
Nanna Kelina
This recipe has a special place in my heart as it reminds me of my beloved nanna. Every Saturday, I used to stop by the Kiosk at the entrance of Valletta and get one to take to her on my way home from the disco (ha ha…disco…those were the days). Then we’d sit down and have a cuppa tea and a chat together while we shared the pastry. To tell the truth, I always ended up eating most of the tart as it was my favourite but Nanna didn’t seem to mind and we were both glad of the chance to spend some time together.
I have to say that this is a very rich dessert and a little goes a long way. One 4″ tart serves 6-8 people. They are usually sold in little four inch tarts but you can make one big tart if you prefer. This recipe makes exactly four 4″ tarts.
Crust
200g flour
50g butter
50g shortening
grated rind of half a lemon
1 egg yolk
pinch of salt
little bit of milk
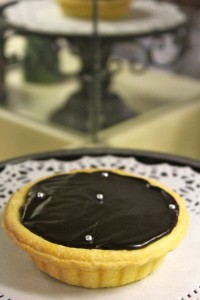
Torta Tal-Marmurat
Filling
75g almond meal
50g pure ground almonds
75g crushed rusks
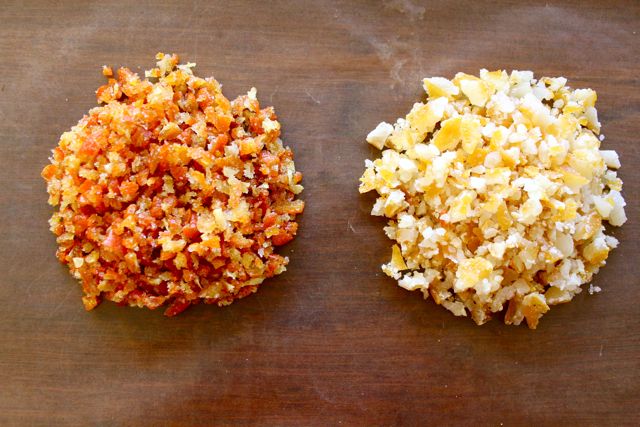
60g chopped candied peel
1tbsp marmalade
1 egg
50g sugar
1/2 cup orange juice
12g cocoa powder
pinch of cinnamon and cloves optional
Fudge Frosting
50g of bittersweet dark chocolate
50g sugar
2 tbsp milk
2 tbsp butter
Ready to Bake
Crust
Make the crust by putting the dry ingredients in a bowl. Rub in the butter and shortening. Add the egg yolk and bind until the dough comes together nicely. Add some milk if you see the dough is too dry.
Filling
Put everything in a bowl and mix together.
Using your dish of choice, roll out the dough and place in your dish. Add the filling and bake in 375 degree oven for about 20 mins depending on your oven.
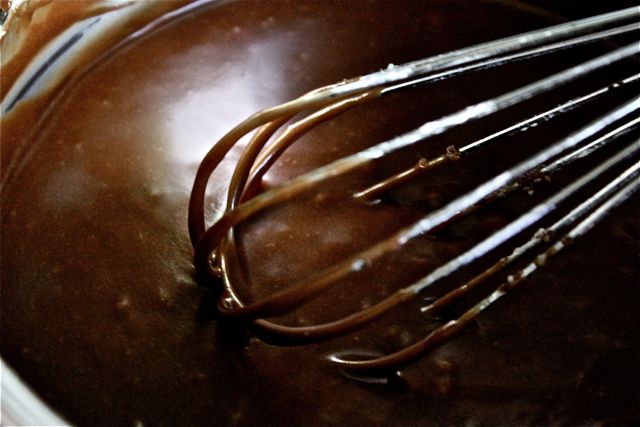
Fudge Frosting
Prepare the Fudge Frosting
Put the chocolate, sugar, milk and butter in a pot and stir until melted. When the pies are done, cover with the frosting.
Let cool until the frosting sets.
This is a very heavy type dessert so a little goes a long way. Best served with some strong black coffee or espresso.
Torta Tal-Marmurat
One tip I have for you is to make your own candied peel…it takes time, about three days to make it from start to finish, but it does not compare to what you get from the store.
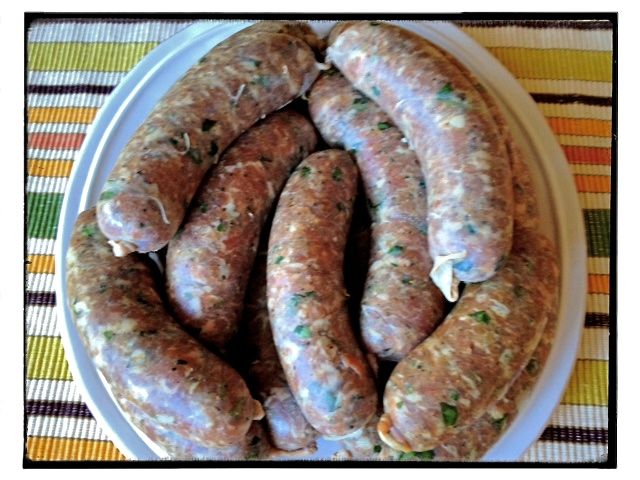
OMG!! Yes!!! This is how excited I am at finding the right recipe to make these garlicky Maltese sausages!
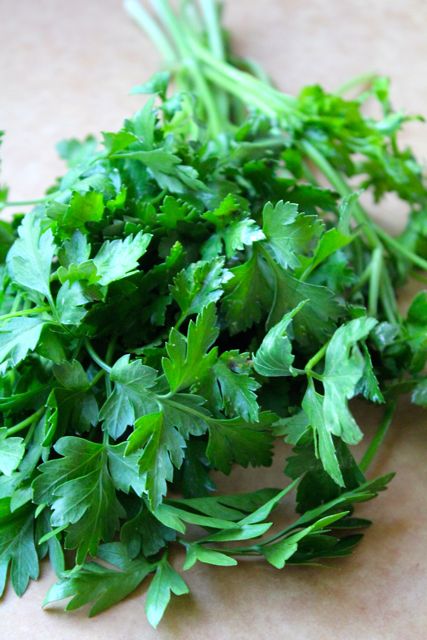
Parsley
Ask any Maltese person which food they miss the most when living abroad and the top three answers would probably be…Ftira, Gbejniet and Maltese Sausage! So far I’ve attempted the first two with great success but somehow making sausages seemed a little bit daunting for me. Just the thought of handling meats and the idea of stuffing casings and actually getting the results I craved for, just didn’t seem possible. Until I saw how Karl, from A Maltese in NY, does them and that took away all the mystery. Having a sausage stuffer attachment or a sausage machine would definitely help the process but if you’re like me, and have no room for any more gadgets, you can certainly stuff them by hand.
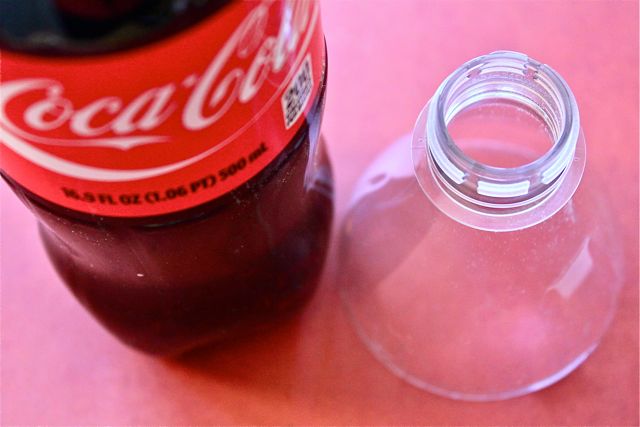
Coke Funnel
When I want to make something there is very little that can stand in my way. So the first stop was to go and find a funnel with a tip wide enough to get the ground meat through and into the casings. Of course, as luck would have it, none of the stores nearby carried any and since time was of the essence (I had waited 20 yrs and could not wait a moment longer) the next best thing was to make my own. And it worked like a charm! I got a small 500ml coke bottle and cut the top 1/3 off and used that.
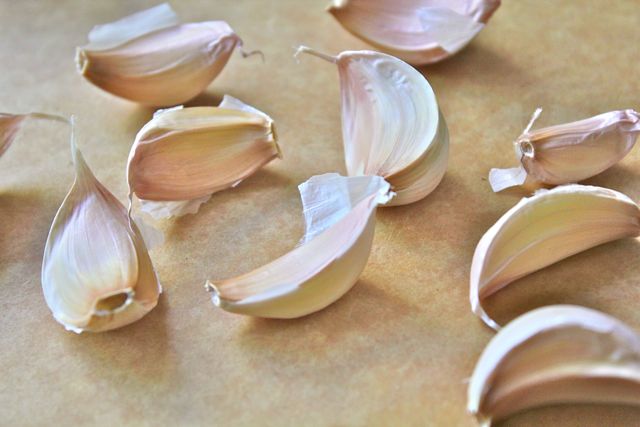
Garlic Cloves
So once I had the funnel, the ground pork, the casings and all the rest, I set about making them. I am not going to say it is easy to fill these sausage manually as I got pretty frustrated at times. Like when I tried to take a short cut and stuffed more than I should and ended up ripping the casings only to have to start all over again. But once I got going, and realised I had to be patient and take my time, it was ok. I shall be making these again and again. They are worth all the work involved!
Ingredients
4.5 lbs of ground pork butt or shoulder (2kg)
1oz black pepper ground (30g)
0.5-1oz coriander seeds crushed (15g-30g)
1-2oz sea salt (30g-55g)
10 garlic cloves minced
bunch of parsley finely chopped
I asked the butcher at Whole Foods to mince the meat for me and he was very helpful and even explained to me the difference between the pork butt and shoulder. How the pork butt has the fat in the meat and the pork shoulder has the fat all around. I took his word for it. He also said that they use what they call the Picnic to make their sausages as it is “more economical and more flavourful”, and that’s what I used.
Ingredients
Put all the ingredients together and mix well. Fill the casings according to your machine’s instructions. Or, if you don’t have the machine…start by putting the opening of the casings to the funnel, hold on tight to it and stuff the filling until you get enough to have two sausages any length you like. Leave about two inches of casing on either side, cut and tie a knot at both ends and twist in the middle. Prick them all over so they don’t explode when you cook them. Rinse them and hang them to dry for two to four days in a cool place.
Thank you Karl for sharing your wonderful recipe. Now everybody will be able to taste of Malta wherever they may be.
This recipe has been in my to do list for about three months and the reason I had not attempted it before now is because it is a recipe shared with me by my very talented baker friend Rose and I was so blown away by the taste and presentation of her Cannoli that I felt a bit intimidated to try them myself in case I did not do it justice.
But now that the kids are off from school and I have a lot more time on my hands, I thought I’d give it a try and hope hope hope that I make them half as good as you Rose!
I am probably the only living soul on this planet that is not crazy about cannolis. I love ricotta but mainly in savoury dishes and find ricotta desserts to be a bit too heavy for my liking.
So when offered dessert at one of our get togethers at Rose’s house, I opted for the fruit salad, but couldn’t help eyeing the cannoli which were on the top tier of the dessert stand looking down on the other pastries acting holier than thou. But as I reached over for a taste, it took me all of two seconds to realise why.
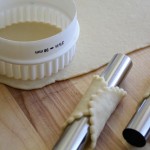
Cannoli Molds
Cannoli Shells
1 3/4 cups all purpose flour 2 tbsp sugar 1/2 tsp salt 2 tbsp butter 1 egg slightly beaten 1/4 cup Sauterne wine egg white + tbsp of water
Cut in the 2 tbsp cold butter in with the flour, sugar and salt.
Add 1 egg slightly beaten.
Add the wine and form into a dough.
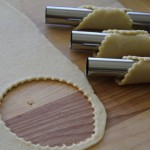
Roll out the dough to a 5 setting on the pasta machine. If you don’t have a pasta machine, then roll the dough quite thin, as you would ravioli.
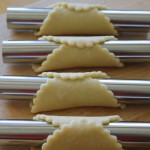
Cut dough into 4″ circles and form loosely onto metal tubes.
Beat the egg white and brush the ends of the dough to glue the ends making sure not to get any on the metal tube. Make sure you seal properly.
Deep fry in melted Crisco when it reaches 400 degrees, until golden brown and drain the shells on paper towels.
These make about 30 shells depending on how big you make them.
Sauternes
Forming Shells
Cannoli Dough
Formed Shells
Ready For Frying
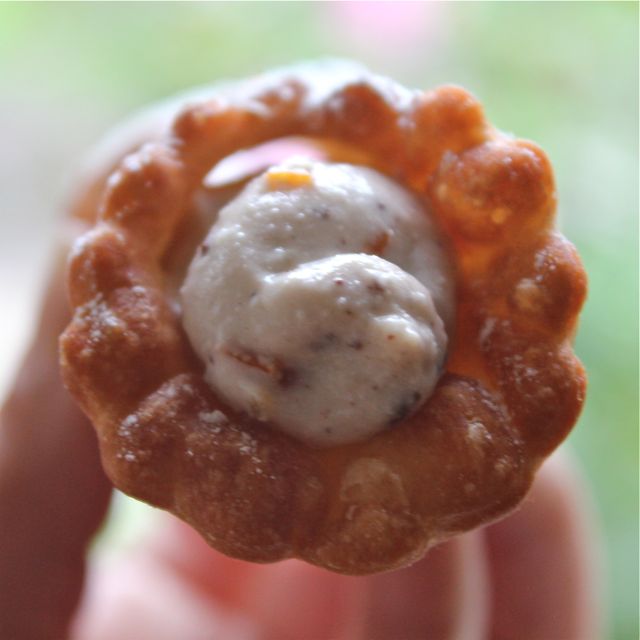
Ready for Filling
Cannoli Filling
Candied Peel
2lbs ricotta
2-4 tbsp powdered sugar to taste
2 tsp vanilla
1/2 cup chopped orange candied peel
1/2 cup chopped candied citron peel
1/2 cup chopped good quality milk or dark chocolate
1-2 drops of cinnamon oil or to taste
Mix all the ingredients until well combined
To assemble Cannolis :
Pipe or spoon ricotta filling into the shells and sprinkle powdered sugar on top.
Perfect dessert to have on hand when you’re hosting a dinner because you can prepare both the shells and ricotta ahead of time and assemble them just before dessert time.
Thank you Rose!
Yummmmm!!
Cannoli Tips :
I did not have cinnamon oil so I used ground cinnamon instead. I hear it makes a difference and it’s on my list of things to add to my baking ingredients for sure. Some people prefer the taste of Fiori di Sicilia…I still have to try that one too. Apparently it’s a wonderful addition to a lot of baked goods.
Do yourselves a favour and make sure to use egg whites to seal the cannoli dough before you fry them cause they do unfurl if you don’t.
Another tip is, that if you have a pasta machine, USE it. It gives the cannoli perfect thickness and consistency. I was a bit lazy to take mine out at first and tried to roll it out with a rolling pin. It worked ok…BUT towards the end, I decided to use the machine and and realised how much better the shells turned out.
I fried the shells one at a time as they brown really quick and a few seconds makes all the difference between golden brown to charcoal black.
If you made the ricotta from scratch, do not let it drip too dry. If that happens, add some whey to make it creamy.
If it’s not sweet enough, add more sugar to taste.
Follow all this and you’ll be left with cannolis to be proud of…
I can’t think of a more appropriate time to post this recipe than now.
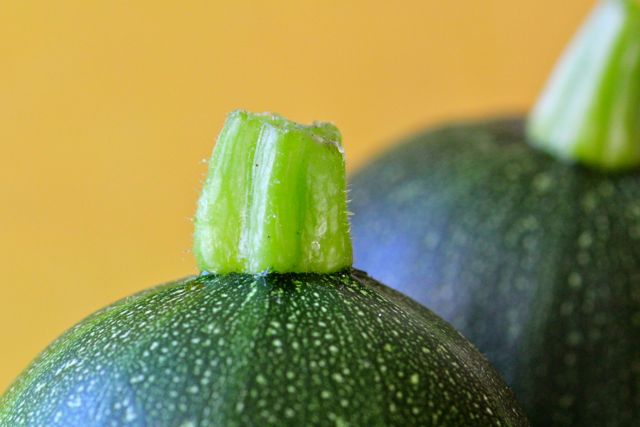
This is the first year that I planted zucchini…or rather that the zucchini that I planted are actually rewarding me with its fruit. Did you know that?? Zucchini is actually a fruit? A fruit that is prepared as a vegetable. I thought that was very interesting, because to me, anything green is a vegetable…except watermelon of course.
Happy Birthday Dylan
So this is a quite an old recipe…18 yrs old in fact! As old as my first born and it’s a known fact that I spent the better part of nine months eating this bread. I’d go visit my family out on Long Island and my cousin Dianne would never let me go back home without a loaf, all sliced up and ready to eat on the one hour long trip back home. And by the time I got home, there’d be nothing left but a few crumbs.
Dylan Graduation
So this morning, when I went out to the garden and noticed that some zucchini were ready for picking, I had to use it to make this bread. Also, it’s Dylan’s b’day next week…18 yrs young!! Where has the time gone?? Seems like only yesterday we were so excited at welcoming our newborn. And now it’s almost time to say goodbye as he heads off to a new beginning…the college years.
And it all started with zucchini bread!
It’s a simple recipe and makes two medium sized loaves. Perfect for sharing with friends…your friends will love you for it! Also freezes very well.
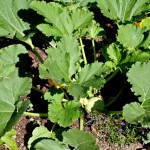
Zucchini Plant
Qarabali~Maltese Zucchini
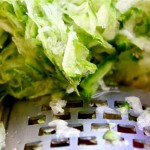
Grated Zucchini
Ingredients
3 cups flour
2 tsp baking powder
1 tsp baking soda
1 tsp salt
2 tsp cinnamon
2 tsp vanilla extract
2 cups peeled and grated zucchini
2 cups sugar
1 cup salad oil
3 eggs
Just mix everything together.
Pour into prepared greased and floured loaf pans.
Bake in preheated oven at 375 for about 45 mins.
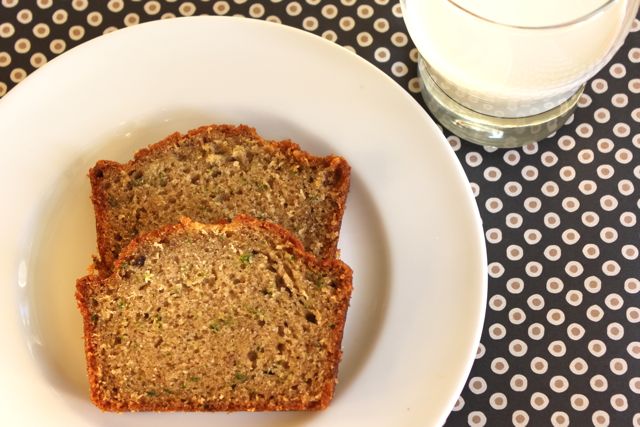
Zucchini Bread
In my opinion, the next best thing to cookies and a glass of cold milk is zucchini bread and a glass of cold milk. So satisfying and comforting anytime. Thank you Dianne for sharing this with me…still one of my favourites and not just for the memories!
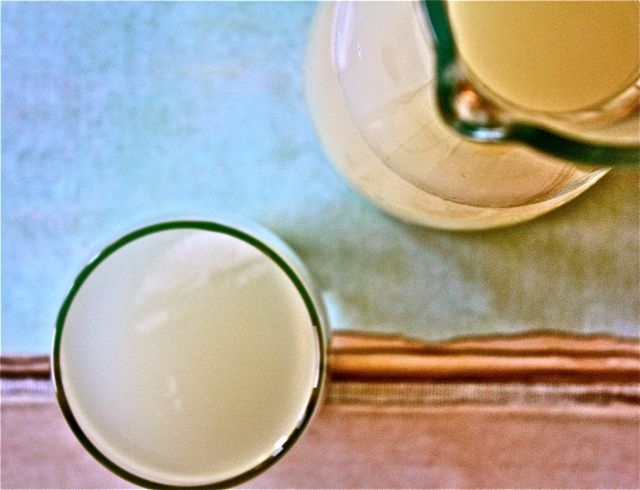
Now that the summer is starting to make it’s mark, I always like to have a bit of Ruġġata tal-Lewz in my refrigerator, diluted with water and ready to pour and enjoy. It’s the perfect thirst quencher and goes down like honey on those hot hot days when it feels like you’re being cooked from the inside out.
Back in the 70’s, my mum would take my sister, brother and me to Valletta on those well known hot Maltese summer days, and after a morning at the market, we would always look forward to going to Zachary Street in Valletta for that chilled ruġġata that would cool our senses or rather induce instant brain freeze. I believe that shop no longer sells ruġġata there as Valletta’s changed a lot since the 70’s.
There would always be a crowd huddled at that little corner window shop with everybody shouting
“Hey, boy, it’s my turn” while waving their liras about to get “the boy’s” attention.
And with great patience he would serve everyone with a smile, knowing that in that heat, everyone’s hot temper would be just about ready to explode.
This is the home made version of our delectable almond cordial…
It might seem like it has a lot of sugar, but don’t forget that you have to dilute this and you only use about a quarter cup to about eight ounces of water and ice!
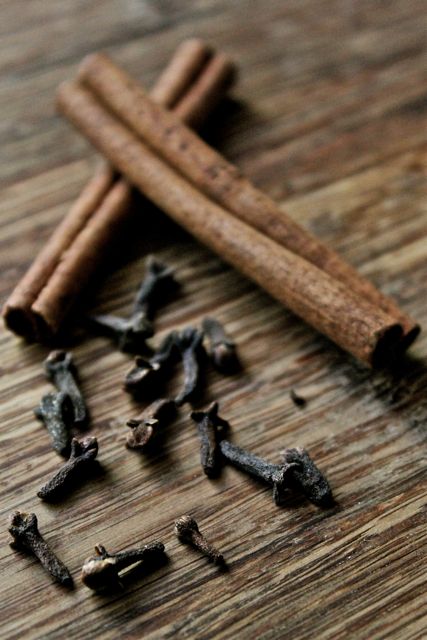
IngredientsCinnamon & Cloves
Ingredients
5 cups water
600gr sugar
lemon rind
12 cloves
1-2 sticks cinnamon
2 tsp almond essence (or more to taste)
1 tsp vanilla essence
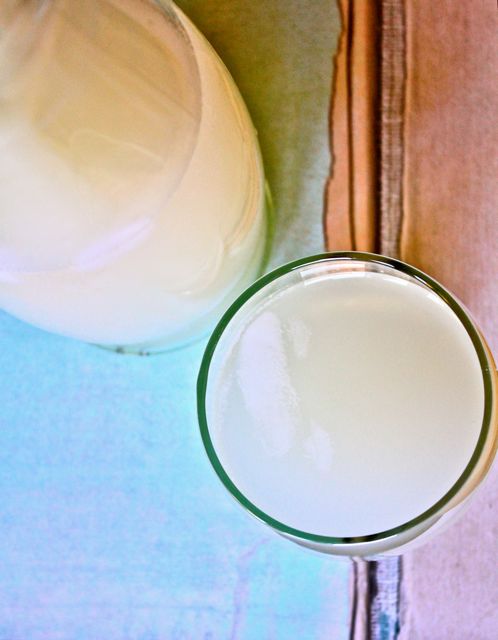
evaporated milk (about a quarter cup)
Method
Place the water, sugar, lemon rind, cloves and cinnamon in a pot and let it boil.
Reduce the heat and let simmer for 15 minutes.
Remove from heat.
When the mixture cools, pass it through a sieve to remove rind and cloves.
Add essences and a little bit of evaporated milk.
Pour in clean bottles and place them in the fridge.
Dilute with water to taste.
Well, when I went outside this morning, the sight that met me did make me very happy though.
Disneyland, one of my more compact rose bushes, always gives a marvelous spring display of roses, but I’ve never seen it produce over twenty four blooms on one stalk.
I am told that the previous owners of our home were avid bird lovers and one of the husband’s hobbies was making bird houses. It wasn’t hard to detect that as we must’ve found about twenty birdhouses placed all over the garden. Some even survived the test of time and this particular one is exceptionally attractive to all sort of birds. We’ve had robins nest on top, hummingbirds thinking the flowers painted on were actually real, and this year a family of wrens were born.
Here’s the mama wren bringing food for her babies…if you listen hard you can even hear the babies’ high pitched chirps.
I wish I could see through the bird house but I enjoy them just as much sitting in my favourite chair in my kitchen looking out my window every day seeing mama and papa wren working tirelessly feeding their young!
The day after I shot this video, I was looking out my window and noticed that mama wren had not visited for a while. Yes, the baby birds had flown the coop and I had missed the flight. Must’ve happened during the night. Here’s the nest inside the birdhouse…